Showing posts with label womens health over 40. Show all posts

Monday, May 27, 2013

KHFP Week 23: Get Your Yoga ON!

At the beginning of this health and fitness project I had envisioned being able to easily come up with twenty-four different habits that in one way or another addressed the unique needs and obstacles that women over forty face concerning weight loss. I ended up combining some habits, therefore creating the challenge of finding a few more habits in the last few weeks. It has been a challenge, therefore, causing big gaps in coming up with the last few weekly healthy habits. At last, yoga seemed to be just the habit that encompasses all the previous weekly habits. By no means is this meant to be an exhaustive post about yoga, instead, it is meant to give a basic understanding about yoga and how it relates to living a healthy lifestyle.


Yoga is a good fitness alternative for people over forty and those who have limited physical capabilities. The baby boomers are getting too old for high-impact sports or aerobics and are ready to embrace something gentler and kinder to their aging joints. Yoga is also very beneficial for people of all ages and stages of their lives. Yoga offers a way to bring balance to a person’s whole being: physically, mentally, emotionally and spiritually.

When beginning to delve into practicing yoga, it can be a little overwhelming to learn that there are many different styles of yoga taught world wide, and determining which one is best suited for your needs. Therefore, the best way to start is to know the basics about yoga and then determine which style is the most beneficial for you.

There are many reason why someone would practice yoga. Yoga tones muscles, improves flexibility and posture, and helps regulate weight, it keeps you feeling youthful, fit and full of vitality. Yoga helps maintain a balanced metabolism, it stretches the muscles lengthwise causing fat to be eliminated around the cells, thus reducing cellulite. This is why many people have chosen yoga as a means for weight loss.

The definition of yoga means literally to yoke, to unite, to be whole. Yoga’s aim is to unite the body, mind and spirit. A male yoga practitioner is called a “yogi” and a female practitioner is a “yogini”. A Swami is a title for a spiritual master and a Guru means one who takes you from the darkness to the light, and is often casually used to denote a teacher or master.

 
Yoga has been practiced for centuries in the Eastern world for spiritual, religious, philosophical and academic purposes. It is has been introduced to the Western world by way of Eastern yogis and swamis and has gained in popularity in the United States. The Indian Sage, Patanjali has been credited with “The Yoga Sutras”, a collection of one hundred ninety-five statements. This is a guidance on how to gain mastery over the mind and emotions and advice on spiritual growth. The Yoga Sutras provide the framework upon which all yoga practiced today is based upon. There are six or seven different branches of yoga, each having its own unique path. Based on the yoga sutras, there are eight limbs of yoga that help you reach different levels of meditation and spiritual enlightenment.

The simplest way to grasp the concept of yoga without getting to academic is to start with the different branches of yoga and then discuss the eight limbs of yoga, the yoga postures and then the different styles of yoga.


The Branches of Yoga


1). Hatha Yoga: is the yoga of activity, it is the physical postures, poses and exercises that work directly on the body. The discipline of Hatha yoga is the physical aspect of yoga developed as a vehicle for meditation, creating the necessary physical strength and stamina that allows the mind to remain calm. “Ha” meaning sun and “Tha” meaning moon. The common interpretation of Hatha yoga is “a union of the pairs of opposites”. Hatha is sometimes interpreted to mean the balance of opposites, male and female.


2). Raja Yoga: means “royal” and is known as classic yoga. Meditation is the focal point which this branch adheres to, and strict adherence to the eight limbs of yoga from the Yoga Sutras. The focus is on training the mind to serve the spirit through meditation. This branch is best suited for religious and spiritual persons.

3). Karma Yoga: the path of service or “right” action, people who serve others and help without any thought of reward. What we experience today is created by our actions in the past. The path of self-transcending action. A way to serve others by living in a selfless fashion as in volunteering.

4). Bhakti Yoga: the path of devotion and selfless love, a positive way to channel the emotions. The yoga of the heart. Just think of Ghandi or Martin Luther King Jr.

5). Jnana Yoga: the yoga of the mind, of wisdom, the path of the sage or scholar. Discerning that which is real from that which is unreal. Requires development of the intellect through the study of the scriptures and texts of the yogic tradition. The most difficult and direct branch that requires serious study.

6). Tantra Yoga: means the place where opposites meet and become one, it teaches that there is no difference between the big opposites, the finite and the infinite, or the Divine and the divinity that is ordinary life. It is the pathway of ritual which includes consecrated sexuality. Consecrated means to make sacred, to set apart as something holy. The most esoteric branch of yoga that appeals to those who enjoy ceremony and relate to the feminine principle of the cosmos which yogis call “Shakti”.

7). Mantra yoga: the yoga of potent sound. Mantra translates literally as “mind projection”, a technique for using patterns of sound through chanting or reciting to help focus the mind.


The branch of yoga that most people are familiar with is Hatha yoga, it utilizes the postures of yoga as a precursor for meditation. There are so many aspects of yoga that go way beyond the physical aspect, these are highlighted within the limbs of yoga.


The Limbs of Yoga

In the Yoga Sutras, the eight-fold path is called Ashtanga which means eight limbs. These eight stages/limbs act as a guideline on how to live a meaningful and purposeful life, to serve as a prescription for moral and ethical conduct and self-discipline, as a way to direct attention toward one’s health and to help us acknowledge the spiritual aspects of our nature.


8 Limbs of Yoga:
1). Yama (Do Good): deals with one’s ethical standards and sense of integrity focusing on our behavior and how we conduct ourselves in life. The Golden Rule: "Do Unto Others as You Would Have Them do Unto You". The yamas encourage moderation and discourage violence, stealing, lying and possessiveness. There are five yamas.

 The 5 Yamas
1). Ahimsa: non violence or non injury
2). Satya: truthfulness
3). Asteya: non stealing
4). Brahmacharya: continence
5). Aparigraha: non covetousness

 
2). Niyama (Be good): serve as ground rules for self-discipline and inner awareness. They encourage purity, contentment, chastity, self-study and awareness of the spirit. They are individual practices having to do with self-discipline and spiritual observances like attending church or saying prayers. There are also five niyamas.

The 5 Niyamas

1). Saucha: cleanliness
2). Santosa: contentment
3). Tapas: heat; spiritual austerities
4). Svadhyaya: study of sacred scriptures and of one’s self
5). Isvara Pranidhana: surrener to God

 
3). Asana (Feel Good): the postures practiced in yoga that keep the body healthy and the mind calm. Through Asana we develop the habit of discipline and the ability to concentrate. Asanas literally means steady poses.


4). Pranayama (Live Good): breath extension or control, techniques designed to gain mastery over the respiratory process while recognizing the connection between the breath, the mind, the body and the emotions. Literal translation “Life Force Extension”. You can practice Pranayama as an isolated technique or integrate into your daily Hatha yoga routine.

5). Pratyahara (Inner Focus): sensory withdrawal or sensory transcendence. It is the process of becoming aware of, and learning to control thought patterns. Attention is drawn away from the five senses, instead focuses inwardly in order to quiet the mind. Pratyahara is an opportunity to step back and take a look at ourselves, allows us to objectively observe our cravings and/or habits that are detrimental to our health.

6). Dharana (One-pointedness): the practice of Pratyahara creates the setting for Dharana which is concentration. The mind once withdrawn into itself is fixed in one-pointed inner concentration. One learns how to slow down the thinking process by concentrating on a single mental obeject; a specific energetic center in the body, an image of a diety or the silent repetition of a sound.

7). Dhyana (Deep Meditation): meditation or contemplation, it is meditation without focus on a object and is rooted in a deep inner space of awareness. The uninterrupted flow of concentration is a state of being keenly aware without focus. The mind is quieted and in the stillness it produces few or no thoughts at all.

8). Samadhi (Absorption): a state of ecstasy in which the meditator becomes one with the object of meditation or merges with his/her point of focus and transcends the self altogether. One achieves a profound connection to the divine, an interconnectedness with all living things and is one with the universe. One is spiritually awake and absorbed in the Infinite.

Of the eight limbs of yoga, both asanas and pranayama are used in majority of the styles of Hatha yoga. These two are the simplest and most basic aspects of yoga that most people are familiar with or think of when they hear the word yoga. Steady poses or “asanas” are the physical postures of yoga. There are a wide variety of asanas (over 200) each one with its own distinct form dictated by stretching, counter-stretching and resistance. Alignment of the muscular and skeletal structures is a major focus of the asanas. The intent of proper yoga practice is to create a balance of strength and flexibility in the entire musculo-skeletal system. Most yoga instructors will remind you to breathe (pranayama) through your poses for maximum benefit and to help decrease the chances of injury.

Asana practice provides a 3 step system: creating the flexibility to get into a posture, building the strength to hold the pose in proper alignment, and developing the stamina to maintain it for longer duration. The Asanas or yoga postures include: standing, seated, supine(lying on the back), prone(lying face down) and inversions(headstands, shoulder stands, etc).

 
Standing Poses: help us build a physical foundation of strength and stability, offering an excellent way to get grounded and centered.
Seated Poses: there are static seated poses, seated forward bends and twisted seated poses.
Prone poses: facing the floor either on hands and knees or on your stomach. These are the more active postures, that are for strengthening of the arms and musculature of the back, weight bearing postures as well as back-bending poses.
Supine poses: lying on the back, more passive, used as a reference for alignment and symmetry of the back
Inversions: reversing the body’s relationship to gravity, increases circulation, stimulates the brain and enhances the glandular system. Headstand (King), Shoulder stand (Queen), and Plough (Prince).


If you have ever been to a yoga class or played a yoga workout dvd you may have heard the instructor calling out the names of the asana poses. Some instructors will use the English names and some may use the Sanskrit names. Here are some common yoga asanas.


Names of some common yoga postures (asanas):

The Sunbird or cat stretch (Chakravakasana): traditionally found in viniyoga style. It provides range of motion in the spine and the placement of the pelvis, it initiates the strengthening of the arms.
Four-limbed staff or Plank pose (Chaturanga Dandasana): chat is the number four, anga means limb and danda is a staff or rod in Sanskrit. This pose teaches the importance of proper placement and body mechanics.
Cobra (Bhujangasana): shows up in virtually every style of hatha yoga.
Downward-Facing Dog (Adho Mukha Svanasana): weight bearing posterior stretch is favorite in Iyengar style, it stretches and releases tension in the upper spine and neck. It strengthens the hamstrings and arms, helps relieve depression, anger, insomnia and stress.
Chair Pose (Utkatasana): utkata means powerful and fierce as well as akward and uneven, this pose builds strength and stamina.
Triangle Pose (Utthita Trikonasana): utthita means extended or stretched, it’s a lateral stretch allowing torso to extend to the side and over the leading leg.


Tree Pose (Vrksasana): vrksa is a tree, this pose is the most elementary one-leg balance in the classic hatha yoga repertoire. 
Mountain pose (Tadasana): improves postures and balances the mind, common in all styles of hatha yoga.
Child’s Pose (Mudhasana or Balasana): relaxes the body between poses, helps to relieve back pain and brings clarity to the mind.
Bridge pose (Setu Bandhasana): stretches the abdominal and lumbar spine muscles, it adds strength to the thighs, and opens the chest and pelvis.
Spinal Twist (Ardha Matsyendrasana): alleviates tension in the spine, neck and shoulders and helps the alignment of the spinal and cervical vertebrae.


Yoga is broad in scope and can seem confusing when just beginning to practice. If someone asked you what style of yoga do you practice, you may or may not know the answer. People may think that all yoga is the same, not knowing that there are several styles of yoga to chose from based on what you want to get from it. The style of yoga you choose is very important in order for you to get the maximum benefit. In most cases, yoga is sought after for weight loss and stress reduction. Therefore, the style you choose to practice should highlight the benefits you seek. For instance, Ashtanga yoga is a good choice for weight loss and for athletes.


Styles of Hatha Yoga
Many of the styles have specific characteristics which refer to a particular teacher’s approach to Asanas. Not only are the poses taught slightly different from teacher to teacher but the names of the postures may be different too. Knowing and understanding the style of yoga being taught is good to know because it allows you to know what you can expect to get out of the class. Most yoga taught in classes and involves postures are considered hatha yoga.

Iyengar Yoga

This style is most wildly recognized Hatha yoga technique in the Western world created by B.K.S Iyengar. This style is precise and dynamic and pays close attention to placement of feet, hands, pelvis, alignment of spine, arms and legs, and on meeting individual needs through the use of props. It is a slow to moderate pace and uses props like wood blocks, benches, sandbags, blankets, bolsters and straps. There are strict requirements for becoming a certified Iyengar yoga instructor.

Ashtanga Yoga
This is not to be confused with the eight-fold path or ashtanga of Patanjali, it is called the Ashtanga vinyasa yoga system of K. Pattabhi Jois. This style is a rigorous practice similar to that of an athlete. Vinyasa is a method of a set sequence of a synchronizing progressive series of postures with a specific breathing technique and is characterized by a continual theme, or chorus of jumping Sun Salutations performed between a variety of asanas. This process produces an intense internal heat and a purifying sweat that detoxifies muscles and organs. Ashtanga is performed in a heated room between 70-75 degrees. The most physically demanding of all the Hatha yoga styles and is referred to as “Power Yoga”. There are six sequences in total whose purpose is to create heat or tapas (means to burn). The first sequence focuses on forward bends, the second sequence focuses on back-bending and sequences 3-6 are very advanced, only a small percentage have mastered these. Ashtanga places equal emphasis on strength, flexibility and stamina.

Viniyoga
Viniyoga was founded by T.K.V Desikachar and it is based on the principle of vinyasa krama which means an intelligently conceived step by step approach. It is good for those just beginning yoga or who has limited flexibility Viniyoga modifies and tailors postures to the needs of the individual student using all the tools of yoga (asana, mantra, pranayama and meditation) and teaches you how to apply those tools in creating an individualized practice. It places emphasis on breath and a more relaxed approach to placement, a slower pace of execution, and a conscious application of yoga theory. Teachers set the pace of viniyoga with the use of a metronome.

Kundalini Yoga
Yogi Bhajan introduced Kundalini yoga to the West and is called the “mother yoga”. It is a unique and distinctive form that encompasses the eight limbs of yoga and includes centering with a mantra, warm-up yoga, practicing a specific yoga set, deeply relaxing in Corpse pose and a finishing meditation. It is designed to awaken the Kundalini or the coiled energy stored at the base of the spine. This is done through the use of breath, posture, chanting, and meditation. This energy is stimulated and consciously directed through the chakras along the spine. The teachers of this discipline emphasize several breathing techniques.

Kripalu Yoga
Developed by Yogi Amrit Desai, it is characterized by its internally directed approach to asana practice. Compassion is the focus of Kripalu yoga, the philosophy says that the spirit will blossom when the body and mind are watered with the nectar of compassion. The class will consist of pranayama, stretching, postures and deep relaxation. Kripalu has three stages.

Stage 1: a willful practice to get you in touch with your body, it teaches the basic mechanics of the postures including placement, alignment, and coordination of breath and movement
Stage 2: referred to as will and surrender, introduces prolonged holding of the poses, emphasize the monitoring of mental and emotional states.
Stage 3: becomes the surrendering to the wisdom of the body, Desai calls it a Meditation in Motion. The practice becomes more interpretive, a “go with the flow” non-competitive atmosphere.

Ananda Yoga
Developed by American J. Donald Walters, known as Swami Kriyananda. In this technique, each posture is viewed as a way to expand, or heighten, self-awareness. Ananda uses affirmations as a technique for raising consciousness while deeply relaxing into the poses.

Bikram Yoga
Yoga College of India-Choudhury was founded by Bikram Choudhury who created Bikram Yoga. It has twenty-six postures with two pranayama techniques (one at beginning and one at the end). Nearly all postures are repeated twice and held at least 10 seconds. Good routine for those already fit. The first part of the routine consists of standing poses. The second part is done on the floor with backbends, forward bends and twists. The thermostat is set to 80 degrees or higher and a humidifier is also used in order to facilitate a deeper stretch to the muscles, detoxify the body, and increase the heart rate for a better cardiovascular workout.

Integral Yoga
Developed by Swami Satchidananda, founder of Integral Yoga Institutes. It is an integrative method incorporating yoga principles into lifestyle and thought. Ease in body, peace of mind and usefulness in life are the guiding principles. Integral yoga follow a set pattern and are 75 minutes in length. This includes 45 minutes of asana, a deep relaxation, a pranayama sequence and ends with a meditation. The feeling of the class is gentle and meditative.

Sivananda Yoga
Developed by Swami Vishnu-Devananda, a disciple of Swami Sivananda, This system of yoga incorporates Sivananda’s five-point method of practice which includes exercise, breathing, deep relaxation, a vegetarian diet, positive thinking and meditation. The classes are based on a routine of breathing exercises, sun salutations, a series of twelve classic yoga postures and relaxation. A short mantra chant and prayers begin and end each class.

Anusara Yoga
Anusara Yoga founded by John Friend. The central philosophy is based on the view that the body, mind and spirit are equally divine, and therefore equally honored. these principles are expressed in the three A’s of Anusara yoga: attitude, alignment and action. Muscular and organic energy are aspects of every pose.

Raja Yoga
Developed by Swami Rama. Raja Yoga is practiced in the Himalayan Institute. Students practice Hatha yoga, meditation, selfless service and healthy lifestyle choices. This style combines steady postures with stillness of the mind.


When a person begins to practice yoga, it is not a prerequisite that you have to change your eating habits. But in order to reap the full benefits of yoga, you must begin to eat a clean, healthy diet. Yoga is a complex system that involves physical movements, proper breathing and meditation. In order to do all this effectively, you should properly nourish your body with the best foods for maximum results. The ultimate diet is raw vegan, but everyone is not ready to give up meat and cooked foods. Here is a simple way to help you pick foods that will give your body what it needs to perform efficiently when practicing yoga.

The three types of food known in the science called Ayurveda are Rajasic, Tamasic and Sattvic. The Ayurvedic system emphasizes that health is a harmonious and holistic functioning of the body, mind and spirit. It incorporates herbs, nutrition, rest, exercise, massage, yoga, meditation and other lifestyle recommendations to restore balance and regain health.


Rajasic foods are considered over stimulating. The yogic diet avoids these types of foods: chocolate, refined sugar, tea, coffee, soft drinks, fast foods and snacks, and foods that are overly salted. They are avoided because they are believed to over stimulate the body and mind, causing physical and mental stress and restlessness.


Tamasic foods are considered dulling foods, they are avoided because they produce feelings of heaviness and lethargy. These include: meat, fish, eggs, drugs, and alcohol. Foods that have been fermented, burned, barbequed and fried have tamasic qualities. A diet high in tamasic foods makes a person dull and lazy, plus contributes to chronic ailments and depression. Overeating is considered tamasic.


Sattvic foods are said to be calming. The yogic diet is made up of sattvic foods that help maintain internal equipoise while nourishing the body. Sattvic foods are wholesome, pure, naturally delicious foods such as: fresh and dried fruits, raw or slightly cooked vegetables, salads, grains, legumes, nuts, seeds, wholegrain breads, honey, fresh herbs, and dairy (butter, milk). A sattvic diet is easily digested and supplies maximum energy, together with yoga and meditation a strong partnership is formed that promotes health and well-being.

Sattvic foods make up a vegetarian’s diet. Vegetarians come in different packages, a lacto-ovo vegetarian eats dairy products and eggs, a lacto-vegetarian eats dairy and a vegan eats only plant-based foods. As a practitioner of yoga you would do well to eliminate meat and eggs from your diet and limit your intake of dairy to organic products or substitute soy, rice or nut milk products. You will feel physically and mentally more fit. If transitioning to a vegetarian diet, you may want to change your diet gradually. First, eliminate red meat, then gradually over a period of a few months, begin to eliminate fish, chicken and eggs, and limit your intake of hard cheeses (as it taxes your digestive system).

Yoga can be one of the best workout solutions for women over forty because it is low impact, non-competitive and keeps you feeling young and healthy. It has a unique way of addressing many of the health issues that older women experience like menopause, belly flab, pain and stiffness as well as digestive problems and other health ailments.

When it comes to participating in yoga, you can opt for the class offered at the nearest gym, the community center, a yoga instruction dvd or you can be more selective by finding a particular teacher who teaches a specific style. When choosing a yoga teacher and yoga style there are a few things you should think bout:
 
  • Think about your present physical needs
  • Determine what you want and expect to get out of the class
  • Ask the instructor about his/her credentials and training
  • Take classes in different styles til you find the one that works best for your needs
  • The beauty of yoga is that you are never too old or too young to start
  • Every individual who takes up yoga reaps different benefits from it


**** Disclaimer**** If you have a medical condition, don’t practice yoga until you’ve consulted a medical doctor.


Yoga Internet Resources:


www.yrec.org  has in-depth understanding of the who, the what and the where of yoga.
www.yogasite.com This is an internet based resource center for anything related to yoga. It provides lots of great information and links to other yoga sites.
Yoga Finder www.yogafinder.com is a website specifically to help you find classes and teachers throughout the world
www.yogajournal.com and www.yogainternational.com both of these magazines annually print extensive directories of yoga teachers. They have wonderful articles about yoga, book reviews, yoga retreats and more.
Gaiam www.gaiam.com  is one of the finest sources for all kinds of yoga, meditation and relaxation tools. You’ll find yoga mats, pillows, clothing, books and videos to get you started in yoga.
www.yogaworkshop.com Richard Freeman is one of the foremost teachers of Ashtanga and responsible for the workshop
www.power-yoga.com Beryl Bender Birch has lots of great Ashtanga yoga information especially for athletes. In his book “Power Yoga” he demonstrates how you can prevent and repair sports strains and injuries.
www.pierceprogram.com Margret and Martin Pierce created simple and clear guide to viniyoga.
www.3HO.org offers information about every aspect of Kundalini yoga.


Assignment
Determine your reason for practicing yoga. Is it for weight loss, creating lean muscles, greater flexibility or less stress. Next pick which style of yoga best matches your reason, it may be more than one suitable yoga style. Find a yoga class in your area and check to see what style of yoga is practiced. If your preferred style is not offered, then search some of the yoga internet sites for that particular style, ask around or dabble in a few classes until you find what you want. Talk to the yoga instructor before or after class and ask questions. Once you begin yoga, you may not be able to do all the asanas initially but gradually as you eat right and participate regularly, you will become more flexible and fit. Remember, yoga is not a competition, it should be fun, relaxing and invigorating.


Weekly Checklist (Weeks 1-22)
Drink 8 glasses of water every day
Eat a Hearty Healthy breakfast
Get movin’ by walking or aerobics
Eat an Apple or Pear everyday
Say no to your poison, ditch the junk food
Go a little nuts by eating a handful of nuts
Toss Up a Big Bowl of Salad
Take Your Vitamins
Pump It Up!!!
Trade Up Your Drinks
Sprinkle Some Flax on It
Abs are made in the kitchen
Trade Up Your Dairy
Grab a Superfood
Plan Your Healthy Day
Trade Up Your Oil
Eat Lower on The Glycemic Index
Whip Up A Power Smoothie
Willpower Versus Skill-power
Ditch The Salt
Spice It Up!
Drink an ACV cocktail
Get Your Yoga ON!


References
“Yoga Basics: The Essential Beginner’s Guide to Yoga for a Lifetime of Health and Fitness” by Mara Carrico, editors of Yoga Journal
“K.I.S.S Guide to Yoga” by Shakta Kaur Khalsa


Picture Sources
Tree Pose
Ashtanga yoga
Child’s PoseHatha Yoga
Yoga Class
8 Limbs of Yoga
Rajasic Foods

Tamasic FoodsSattvic Foods


Monday, February 11, 2013

KHFP Week 15: Plan Your Healthy Day

Kandie’s Health & Fitness Project is about making small but significant healthy changes a little bit at a time. The project is meant to be especially beneficial for women over forty by incorporating healthy foods and exercises that address this age group and their special needs. Each week points out the benefits for adding these healthy foods. The descriptions are broad in nature, but if you look closely the descriptions point out benefits like helping with osteoporosis, increasing metabolism, boosting the immune system, and lists vitamins & minerals. All these things concern your health as you get older.

The corresponding information is just that, information for an individual to determine or realize how it can benefit his/her health situation. Some elements like the super foods have antibiotic properties, anti-inflammatory properties, and are effective as pain relievers. Also, things like switching to non-dairy products like soy has been found to better benefit women when it comes to weight loss. Eating more fruits, vegetables and whole grains are also known to help women approaching and going through menopause. Many books have surfaced regarding menopause and a woman’s eating habits, which they say can better alleviate the effects of menopause. Therefore, each one of this project’s healthy tweaks will benefit anyone, but it is tailored for women over forty and written from a woman over forty perspective.


The fitness project is past the half way mark and now is the time to start putting things together more cohesively. You need to be able to plan your day in advance in order to keep you on track. There are so many obstacles that can steer you away from eating healthy and exercising regularly. Some of these can be your food budget, your job, your family, your friends, stress, emergencies, your schedule etc. This week’s focus is to get you thinking ahead of time and preparing meals and snacks in advance. You can designate a specific day like Sunday to plan out your entire week. You can set aside a specific time of day to plan your meals and workouts. However you decide, just plan on making out your schedule. As the saying goes, “If you don’t have a plan, then plan to fail”.


Think about all the previous weeks' tweaks and determine which ones you need to do everyday. Some of them you can incorporate into your schedule 3-4 times a week instead of everyday. For instance, drinking 8 glasses of water a day, eating a hearty breakfast and eating an apple should be done everyday. Exercises like walking or weight training can be done every other day. Refer to the weekly checklist at the end of this post for the entire list.


Get organized so you can have a plan laid out in front of you that you can refer to throughout the day to keep you on track. When you put everything in writing it holds you accountable, kinda making sure you get it done. The reason why most people fail at weight loss is because they don’t have a plan. One of the reasons why weight loss programs like Jenny Craig, Weight Watchers or Nutri-System work is because they do all the work for you and put you on a plan. This is great because if you are very busy the meals are created for you. The one drawback is that once you are off the structured meal plan you tend to fall back into your old unstructured unhealthy bad eating habits.
 

You need to arrange your day according to your own needs. Make sure to jot down your work and family responsibilities first and then schedule your three meals and snacks. You can create your own daily spreadsheet or get a daily planner that you can carry with you for reference and reminders. You can search online for menu planners you can download for free to help get you started. It may start off kinda rough but once you get the hang of it, you can plan weekly meals and shopping lists. The more involved you are in the planning process, the more successful you will become. Make sure to keep your cupboards stocked with some basic staples to help with the planning process. This can be whole grain breads, cereals or crackers, whole grain flours for baking, whole grain pasta, nuts, seeds, olive oil, dried fruits, canned beans, canned fruits, and protein or energy bars. You can start planning your meals and shopping list based on the menus in KHFP Week 12 if you are unsure how to create a healthy meal.

 
I can not stress how important it is to plan your day. There has been a few weeks that I’ve found myself struggling to stay on track. But keeping a food dairy has actually helped me become more aware of what I have or have not been consuming. I have noticed how my belly is looking less bloated and my pants don’t feel as snug which means the inches are coming off, I just need to be more focused. By putting myself on an eating schedule, my body tells me when I should be eating. Typically, you should eat something every 3-4 hours while awake. Try not to eat a heavy meal 3 hours before bedtime. So, if your bedtime is 11pm then your dinner should be before 8pm.


Here is what your KHFP schedule might look like (not including work or family):

7:00am     Wake up, drink glass of water (1)
7:30am     Eat hearty breakfast, sprinkle some flax on it & take vitamins
9:30am     Drink glass of water (2)
10:00am   Eat an Apple
11:30am   Drink glass of water (3)
12:00pm  Toss up big salad, add a superfood, drink sparkling water or herbal ice tea
2:00pm    Drink glass of water (4)
3:30pm    Snack on handful of nuts or seeds
4:00pm    Drink glass of water (5)
5:30pm    Get Movin, or Pump It Up
6:30pm    Drink glass of water (6)
7:00pm    Eat dinner based on abs made in kitchen week 12
9:30pm    Drink glass of water (7)
10:00pm  Schedule your day, prepare tomorrow’s meals
11:00pm  Drink glass of water before bed (8)


By preparing your meals ahead of time you can shave off some time during your otherwise busy schedule. That is one less thing you have to stress about. Plus, when things don’t go according to plan you will at least still be on track for your meals. You can make sure you have a piece of fruit, some nuts, or a protein bar on hand to keep you from being tempted to swing through the drive thru. Keep some bottled water or sparkling water on hand as well. Another good way to trade up your drinks and stave off hunger is to keep some herbal tea packs on hand like green tea. You can also add honey or lemon to your water, sparkling water or green tea.


Remember that people are watching you and may not understand why you are so hell bent on eating healthy or why you are by passing on the chips & cookies. Subconsciously they will try and sabotage your efforts, they may mock you and taunt you. Just remember that you have a plan and stick to it. Once they begin to see how you look, act and feel they will ask what are you doing to lose weight because you look great. Tell them that you planned on losing weight and followed this awesome health and fitness project (smile).


Assignment
Determine if you want to plan your schedule weekly, daily or both. Invest in a good planner or create a daily schedule sheet you can fill in and carry with you. I’m a firm believer in setting routines or schedules. I try to eat breakfast, lunch and dinner around the same time everyday because it allows my body to get used to being fed so I won’t skip meals. Make yourself a basic template or checklist based on the weeks we’ve covered so far and then build from there. You can combine tweaks to create an awesome meal in order to get them all into your schedule.
You can download this very basic/generic printable weekly meal planner to enter your meals and use this basic template for scheduling meal times.

Basic Template:
Wake up, drink glass of water #1
Eat hearty breakfast
Put flax on it
Take vitamins
Drink glass of water #2
Eat an Apple
Drink glass of water #3
Lunch: Toss up a big salad
Eat a superfood
Trade Up Your drink
Trade Up Your Dairy
Drink glass of water #4
Go a little nuts
Drink glass of water #5
Get Movin, or Pump It Up
Drink glass of water #6
Dinner: abs made in kitchen
Drink glass of water #7
Snack: say no to your poison
Schedule your day, prepare tomorrow’s meals
Drink glass of water #8 before bed


Weekly Checklist
Drink 8 glasses of water every day
Eat a Hearty Healthy breakfast
Get movin’ by walking or aerobics
Eat an Apple or Pear everyday
Say no to your poison, ditch the junk food
Go a little nuts by eating a handful of nuts
Toss Up a Big Bowl of Salad
Take Your Vitamins
Pump It Up!!!
Trade Up Your Drinks
Sprinkle Some Flax on It
Abs are made in the kitchen
Trade Up Your Dairy
Grab a Superfood
Plan Your Healthy Day


References
“The Lean - A Revolutionary and Simple 30 Day Plan for Healthy, Lasting Weight Loss” by Kathy Freston

Picture Sources
Franklin Planner
Organized Pantry

Monday, January 14, 2013

KHFP Week 11: Sprinkle Some Flax on It


Flaxseeds are found to be a beneficial source of fiber. It is a good health arsenal to have on your quest for weight loss, weight management and overall good health. Many people have no idea what flaxseeds are and therefore do not incorporate these beneficial seeds into their diet. I used to think that flaxseeds were eaten by only vegetarians or health fanatics. What I didn’t know probably did hurt me, especially now, as a women over forty. As women reach that forty year milestone, our bodies begin to change in a way that is unique for each individual. But, there are some shared or common issues that affect women as a whole. By eating a healthier diet many of these issues can be lessened or eliminated. This can be accomplished by being proactive and eating a healthy balanced diet. Choosing to make small changes by consuming things like flaxseeds can help.   


Benefits of eating ground flaxseeds:

There are many health benefits to be gained by eating ground flaxseeds. Researchers have found that these tiny seeds can be very beneficial in fighting several health conditions. The health industry has taken notice as well and have started adding them to many products. But, for most people, we are oblivious as to why flaxseeds are showing up in more and more products. Here are just a few health conditions that flaxseeds help fight against.


Cancer
Recent studies have suggested that flaxseed may have a protective effect against breast cancer, prostate cancer, and colon cancer. At least two of the components in flaxseed seem to contribute, says Kelley C. Fitzpatrick, director of health and nutrition with the Flax Council of Canada.


Cardiovascular Disease
Research suggests that plant omega-3s help the cardiovascular system through several different mechanisms, including anti-inflammatory action and normalizing the heartbeat. Fitzpatrick says new research also suggests significant blood pressure-lowering effects of flaxseed. Those effects may be due to both the omega-3 fatty acids as well as the amino acid groups found in flaxseed. A study of menopausal women showed a decrease in LDL level after the women ate 4 tablespoons of ground flaxseed each day for a year. Fitzpatrick says the cholesterol-lowering effects of flaxseed are the result of the combined benefits of the omega-3, ALA, fiber, and lignans.


Diabetes
Preliminary research also suggests that daily intake of the lignans in flaxseeds may modestly improve blood sugar as measured by hemoglobin A1c blood tests in adults with Type 2 Diabetes.


Hot Flashes
One study of menopausal women, published in 2007, reported that 2 tablespoons of ground flaxseed mixed into cereal, juice, or yogurt twice a day cut their hot flashes in half. The intensity of their hot flashes also dropped by 57%. The women noticed a difference after taking the daily flaxseeds for just one week and achieved the maximum benefit within two weeks.


Why should you eat flaxseeds? 

Flaxseeds are found in all kinds of today's foods from crackers to frozen waffles to oatmeal. The Flax Council estimates close to 300 new flax-based products were launched in the U.S. and Canada in 2010 alone. Not only has consumer demand for flaxseeds grown, agricultural use has also increased. Flaxseeds are what's used to feed all those chickens that are laying eggs with higher levels of omega-3 fatty acids. Although flaxseeds contains all sorts of healthy components, it owes its primary healthy reputation to three of them:


  • Fiber: Flaxseeds contains both the soluble and insoluble types.
  • Omega-3 essential fatty acids: "good" fats that have been shown to have heart-healthy effects.  Each tablespoon of ground flaxseeds contains about 1.8 grams of plant omega-3s.
  • Lignans:which have both plant estrogen and antioxidant qualities. Flaxseeds contain 75 to 800 times more lignans than other plant foods.

Ground flaxseeds are bulk fiber, that is high in soluble and insoluble fiber. Soluble fiber absorbs water, it expands to form a gel-like substance which makes it take loner for your food to digest. Insoluble fiber is roughage, it pushes things through the digestive system. Flaxseeds are low in carbohydrates, high in B vitamins, an excellent source of omega-3 fatty acids, omega-6 and a concentrated source of lignans (a cancer fighting compound). Flaxseeds lower bad cholesterol levels, improve blood pressure, control hot flashes, and also works for enlarged prostate symptoms.


Flaxseeds are commonly used as a laxative to improve digestive health or relieve constipation. Both flaxseeds and flaxseed oil have been used to help reduce total blood cholesterol and low-density lipoprotein (LDL, or "bad") cholesterol levels and, as a result, may help reduce the risk of heart disease. Although flaxseed oil also contains omega-3 fatty acids, it doesn't have the beneficial fiber that the seeds have.


Flaxseeds are high in lignans or phytochemicals and include many antioxidants. It is perhaps our best source of lignans, which convert in our intestines to substances that tend to balance female hormones. There is evidence that lignans may promote fertility, reduce peri-menopausal symptoms, and possibly help prevent breast cancer. In addition, lignans may help prevent Type 2 diabetes. Note that flaxseeds need to be ground to make the nutrients available otherwise they just “pass through” your system undigested. Flaxseed oil alone contains neither the fiber nor the phytochemicals that are present in ground flaxseeds.


How to add flaxseeds to your diet:

Although the Institute of Medicine has not set a recommended daily intake for omega-3 fatty acids, it has established adequate intake amounts of between 1.1 and 1.6 grams a day for adults. One tablespoon of ground flaxseed provides 1.8 grams of omega-3 fatty acids. Add ground flaxseeds to any food, it has a sweet nutty flavor. Add 2 tablespoons of ground flaxseeds somewhere in your daily meals. Whole flaxseeds will pass through your system not allowing you to reap the full benefits. So be sure to buy ground flaxseeds or flaxseed meal. You can also buy them whole and grind them yourself. You can take the full 2 tbsp all at once or break it up over several meals to make them more fulfilling and help guard against the munchies.


Here are a few Tips for including ground flaxseeds in your diet:
Add them to your breakfast rice or oatmeal
Add to your smoothies
Add to your salads
Add to soup, stews and casseroles
Add a tablespoon of ground flaxseed to your hot or cold breakfast cereal.
Add a teaspoon of ground flaxseed to mayonnaise or mustard when making a sandwich.
Mix a tablespoon of ground flaxseed into an 8-ounce container of yogurt.
Bake ground flaxseeds into cookies, muffins, breads and other baked goods.

As you can see, there are many ways you can begin to add ground flaxseeds into your daily meals. Be creative, make it a habit to find new ways that you can sneak in some ground flaxseeds. But, try and stick to recommended 2 tbsp. With all things, moderation is the key, because there can be some side effects if you overdose just like with some vitamins. Do your due diligence, because some research has determined that up to 4 tbsp daily can be just as effective with no known side effects.

There is plenty of information out there on the benefits of eating flaxseeds, where to buy them, how to store them and which ones to buy. Always try and make sure you buy certified organic.


Here are some basic tips for using, buying, and storing flaxseed:
 

  1. Buy either brown or golden flaxseed:  Golden flaxseed is easier on the eyes, but brown flaxseed is easier to find in most supermarkets. There is very little difference nutritionally between the two, so the choice is up to you.
  2. Buy it ground or grind it yourself: Flaxseed, when eaten whole, is more likely to pass through the intestinal tract undigested, which means your body doesn't get all the healthful components. If you want to grind flaxseed yourself, those little electric coffee grinders seem to work best.
  3. Milled, ground or flax meal: Don’t be confused by the different product names for ground flaxseed, milled or ground flaxseed is the same thing as flax meal.
  4. Find it in stores or on the Internet:  Many supermarket chains now carry ground flaxseed (or flax meal). It’s usually in the flour or "grain" aisle or the whole-grain cereal section and is often sold in 1-pound bags. You can also find it in health food stores or order it on various web sites.
  5. Check the product label:  When buying products containing flaxseed, check the label to make sure ground flaxseed, not whole flaxseed, was added. Flaxseed is a featured ingredient in cereals, pasta, whole grain breads and crackers, energy bars, meatless meal products, and snack foods.
  6. Add flaxseed to a food you habitually eat:  Every time you have a certain food, like oatmeal, smoothies, soup, or yogurt, stir in a couple tablespoons of ground flaxseed. Soon it will be a habit and you won’t have to think about it, you’ll just do it.
  7. Hide flaxseed in dark, moist dishes:  The dishes that hide flaxseed the best are dark sauces or meat mixtures. No one tends to notice flaxseed when it's stirred into enchilada casserole, chicken parmesan, chili, beef stew, meatloaf, or meatballs. For a 4-serving casserole, you can usually get away with adding 2 to 4 tablespoons of ground flaxseed. For a dish serving 6 to 8, use 4 to 8 tablespoons.
  8. Use it in baking:  Substitute ground flaxseed for part of the flour in recipes for quick breads, muffins, rolls, bread, bagels, pancakes, and waffles. Try replacing 1/4 to 1/2 cup of the flour with ground flaxseed if the recipe calls for 2 or more cups of flour.
  9. Keep it in the freezer:  The best place to store ground flaxseed is the freezer. Freeze pre-ground flaxseed in the bag you bought it in or in a plastic sealable bag if you ground it yourself. The freezer will keep the ground flax from oxidizing and losing its nutritional potency.
  10. Whole flaxseed keeps longer:  The outside shell in whole flaxseed appears to keep the fatty acids inside well protected. It’s a good idea to keep your whole flaxseed in a dark, cool place until you grind it. But as long as it is dry and of good quality, whole flaxseed can be stored at room temperature for up to a year.
  11. Oxidation/Rancidity:  The oil in flax is highly unsaturated. This means that it is very prone to oxidation (rancidity) unless it is stored correctly. The very best way is nature’s own storage system –- within the seed. Flaxseeds not exposed to large amounts of heat stay safe to eat for at least a year. However, flax meal, and especially flax oil, are a different story. The meal, stored away from heat and light, will keep fresh for a few months, and the oil must be protected by refrigeration in dark containers, preferably being consumed within a few weeks of opening. So, buy the oil in small amounts.Actually, the surprising thing about flax is not that the oils go rancid, but that they don’t go rancid as quickly as we would think, considering how unsaturated they are. The oils are quite stable when the seeds are used in baked foods, for example. Researchers theorize that this is due to the high levels of antioxidants in the seeds.


Refer to the “Frequently asked questions about Flax” website to get more answers concerning flax that you may still have.


For Kandie's Health and Fitness Project, you have yet another healthy tweak you can begin to add to your daily menu to give you an advantage in your weight loss efforts. The little things you add to your meals can sometimes have the biggest impact. Consuming ground flaxseeds by essentially hiding them in your meals gives you more bang for your buck (efforts), yet not making a drastic change in what you are eating. The process, if done slow and steady, should give both your mind and your body time to adjust to a different way of eating that is healthier than your previous eating habits. Practice makes perfect even when learning how to eat healthy. Therefore, don’t beat yourself up if you don’t do everything everyday during this project, but be sure to do as many as you can. Once you begin to eat more fruits, vegetables, nuts & seeds, whole grains and beans you might find out that these foods actually have more flavor (I did, especially 12-15 whole grain breads. Regular wheat bread won‘t do anymore). Adding ground flaxseeds to your meals or snacks is a simple way to incorporate a small but powerful addition to a healthier lifestyle. So, go ahead and sprinkle some flax on it.


Remember that each week builds on the previous week. This means that everyday you should be incorporating each of the weekly checklists into your daily meals. Some of these tweaks may take you a little longer to break into, but put forth an honest effort and you will feel better and healthier. Plus, you will begin to lose weight and get to your ideal body weight without feeling deprived or overwhelmed.
 

Assignment
Your assignment is to add ground flaxseeds to at least three things you eat this week as a primer. But in the following weeks you will add ground flaxseeds to at least one meal everyday. You can start off by adding just one teaspoon to your cereal or yogurt so you can discover how it tastes. Sprinkle it on a muffin or bake it in. But of course you will work your way up to 2 tbsp daily as quickly as your taste buds will allow. For some people, 2 tbsp in one food item is too much, so play with it.


Weekly Checklist
Drink 8 glasses of water every day
Eat a Hearty Healthy breakfast
Get movin’ by walking or aerobics
Eat an Apple or Pear everyday
Say no to your poison, ditch the junk food
Go a little nuts by eating a handful of nuts
Toss Up a Big Bowl of Salad
Take Your Vitamins
Pump It Up!!!
Trade Up Your Drinks
Sprinkle Some Flax on It


References
“The Lean - A Revolutionary and Simple 30 Day Plan for Healthy, Lasting Weight Loss” by Kathy Freston
“Frequently asked questions about Flax”
http://www.healthyflax.com/flax-faq/
"The Benefits of Flaxseed: Is flaxseed the new wonder food? Preliminary studies show that it may help fight heart disease, diabetes and breast cancer.” by Elaine Magee, MPD, RD, WebMD Expert Column
http://www.webmd.com/diet/features/benefits-of-flaxseed
“Ground flaxseed: Better than whole? Does ground flaxseed have more health benefits than whole flaxseed?” By Katherine Zeratsky, R.D., L.D. Mayo Clinic Nutritionist
http://www.mayoclinic.com/health/flaxseed/AN01258
“Flax Seed: The Low Carb Whole Grain Nutrition, Health Benefits of Flax Seed” by Laura Dolson at About.com Guide
http://lowcarbdiets.about.com/od/whattoeat/a/flaxinfo.htm


Picture Sources:
Ground Flaxseeds (bag):
https://encrypted-tbn0.gstatic.com/images?q=tbn:ANd9GcS3RLTb4tf4BFdtXnJcSiiW6EhZPKwbgyXQIq-eqa4XJlrEsMoMCrK3rvJm
Bulk Ground Flaxseeds
https://encrypted-tbn1.gstatic.com/images?q=tbn:ANd9GcQe8ovH8G72brU4I5x4IaZU-esP4Qq38Y6_DEt_fy4N8Tdbd4xQ_d262EQ
Flaxseed Oil
https://encrypted-tbn2.gstatic.com/images?q=tbn:ANd9GcRX-Mk4_NWIzbgMX1bzctmsB_v4xDmMHU5cBLgeBSim-Ciw4_XIJqUXU4Y
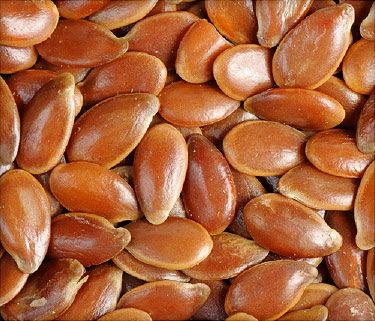
Flaxseeds
http://img.webmd.com/dtmcms/live/webmd/consumer_assets/site_images/article_thumbnails/features/benefits_of_flaxseed_features/375x321_benefits_of_flaxseed_features.jpg


Disclaimer: This article is meant only to provide information. It should not be substituted for expert medical advice.

Tuesday, January 1, 2013

KHFP Week 9: Pump It Up!!!


In week four you began increasing your aerobic exercise by at least walking 30 minutes a day three days a week.  Now its time to really get you in the weight loss phase.  By increasing your aerobic exercise you began burning excess calories and resetting your metabolism.   It’s a start in the right direction, but in the end you want to look great.   In order to look great once you’ve shed those unwanted pounds you need lean sexy muscles.  The worst thing that can happen when you start to lose weight is that you get that excess flab that just jiggles all around (ugh!).  So, in order to combat this unsightly issue, you must perform some strength training.
 
The body changes as we age, and loss of muscle mass (cardiac muscle too) and coordination [process known as Sarcopenia] begins to accelerate in your 40’s.   This means that weight loss becomes difficult unless you are actively doing something to retain muscle.  It is never too late to start strength training whatever your age.


How does strength training help with weight loss?
If done consistently and correctly in conjunction with a balanced diet, then some of the body fat is reduced and some body fat is converted to muscle.   It ensures that you retain muscle mass as you lose weight being that muscle burns more calories than fat, plus it helps to prevent or reverse the natural loss of muscle mass that comes with aging.   While diet and aerobic exercise help you lose weight, strength training will help you lose the right weight “the fat” while retaining and increasing your body’s lean muscle mass.


Cardio or aerobic exercise is the most effective form of physical activity in terms of overall weight loss.   However, strength training is for toning, defining and creating new muscle.   It is known as resistance training, it is the process of converting fat into lean muscle mass.   It also enhances your metabolism, decreases stress levels, increases mental clarity and boosts stamina.   This includes any exercise which uses a form of resistance like weight bands, body weight or dumbbells.  Doing 20-30 minutes of strength training workouts at least 3 times a week will give sufficient results.   But if you want great results, then follow a strength training program that consists of 30 to 60 minute workouts at least three times a week.


The basics for weight training are simple, yet many people don’t know how to get started, they just randomly begin to lift weights with no structure or proper form.  It is advisable that if you don’t have a personal trainer who can show you how to properly perform weight training exercises, then you should do a little research to find out how to properly perform any weight exercise you want to perform.  You can join a gym (not necessary for great results), hire a personal trainer, view videos or books/magazines as long as you get an idea of how to perform the exercise correctly.  Check the American Council on Exercise (ACE) for proper form for many exercises, they have descriptions and videos of various exercises.

Another source you can check for video demonstrations for many exercises is Passion4Profession they have some instructional video tutorials you can find on youtube that illustrate how to perform an exercise in an easy and simple way.  You can also try visiting Fitness Blender for workout tutorials and weight loss programs.

 
The goal for strength training is not to make you look like a body builder, instead create lean muscles that burn more calories than fat.  Most women will not bulk up when doing strength training unless they use muscle enhancing products like steroids.   So to keep your workouts efficient, stick to lighter weights and more reps.  If you do want to develop bigger muscles then you would do fewer reps but with heavier weights.  If you haven’t found a workout routine for strength training by searching the web, Youtube, fitness magazines (Prevention is pretty good), the library, or a purchased DVD (Beachbody.com has good ones) then below is a basic strength training program adapted from “The Fat-Burning Workout: From Fat to Firm in 24 Days” by Joyce L. Vedral, Ph. D, that can get you started.
 
This program doubles as a cardio workout, therefore giving you maximum results in a shorter period of time.  Take your time to learn the basic moves properly to avoid injury and be sure to consult your doctor before starting.  Once you’ve become familiar with the routine, it can be completed in about 30 minutes.  There are three core sections of the body to focus on when strength training which are the upper body, your core/mid section and your lower body.  The upper body parts consists of your biceps, triceps, shoulders, chest and back.  Your core will be combined with the lower body consisting of your buttocks, hamstrings, quadriceps(thighs) and calf muscles.


In this basic strength training program you will be alternating between upper body and lower body by exercising the upper body on one day and then the lower body and core on another day.  You can use resistance bands, body weight, free weights/dumbbells and or weight machines/circuit training.  Remember, that you should still be doing your aerobic exercise/walking in conjunction with adding in strength training.  Here is how your workout schedule might look now:

  • Monday - Upper body routine
  • Tuesday - Walking 45 minutes (at the park or on treadmill)
  • Wednesday - Lower body routine
  • Thursday - Cardio DVD (Turbo Jam)
  • Friday - Upper body routine
  • Saturday - Walking 45 minutes (indoor track)
  • Sunday- Rest or stretch routine
  • Monday - Lower body routine


Make sure you consistently alternate between working out your upper body and your lower body (upper, lower, upper, lower etc..).  Stick to this schedule and this routine for at least six weeks before you add additional exercises or change to a different strength training exercise.  This is just enough time for your body to learn the moves and for you to get familiar with your routine.  However, after about 6-12 weeks you want to confuse your muscles in order to avoid weight loss plateaus by switching up your exercises or adding an additional one.  This is the ideal platform for continued muscle growth and weight loss.
 
If you are a novice when it comes to strength training and working out, there are some basic terminology that you should become familiar with.  When I first started learning about lifting weights, I was confused about basic words like reps, sets, contractions, flexing etc.


Basic Exercise Terminology:

Burn: refers to the feeling that you will sometimes get in your working muscle as the lactic acid builds up in the muscle tissue.  This happens when the blood does not have enough time to carry the acid away as you work.  The burning sensation in your working muscle is a sign that you are working your muscle to the maximum.  As the muscle gets used to the workout, you will experience less of a burning sensation.
 
Contraction: for a given muscle, you shorten the muscle fibers of that muscle by squeezing them together.  For example when you stretch out your arm and then you bend it, then it contracts.
 
Exercise: is a given movement for a specific muscle, designed to cause that muscle to grow and become stronger.
 
Flex: for a given muscle you take the contraction further by giving it an extra willful squeeze by using that muscle more.
 
Progression: is the occasional adding of weight to specific exercises when the weights being used for those exercises are no longer enough of a challenge.
 
Repetition or Rep: is one complete movement of an exercise, from start to midpoint, to finish

Resistance: refers to the heaviness of the weight used in a given exercise.  Example: 3 pound dumbells or 10 pound resistance bands.
 
Rest: is a pause between sets or exercises.  The purpose of the rest is to allow the working muscle enough time to recuperate so that it can efficiently perform the work of the next set.
 
Routine: is the specific combination of exercises prescribed for a given body part.   For example: Upper body routine consists of: 1 set bicep curls - 10 reps, 1 set tricep kickbacks - 10 reps, 1 set pushups - 10 reps and 1 set military press - 10 reps.
 
Set: is a specified number of repetitions of an exercise performed without a rest.  Example: 8 reps of biceps curls is one set.
 
Stretch: for a given muscle you lengthen the muscle fibers by willfully extending that muscle a little further than its natural position.
 
Workout: includes all of the exercise routines for the specified body parts to be performed on a given day. Example: your lower body workout consists of routines for the thighs, buttocks, abdominals and calves.


Expressions for Different Exercise Techniques:
 
Aerobic: is a physical fitness activity that can be sustained by your body’s own natural supply of oxygen and that causes your pulse to reach a rate of between 70% and 85% of its capacity and stay there for twenty minutes or longer.
 
Anaerobic: is activity that is too demanding to be supported by the body’s natural oxygen supply, and so creates on oxygen deficit. When this happens the exerciser is forced to take a rest literally in order to catch his/her breath.  For example, power lifting.
 
Intensity: is the degree of difficulty of the exercise program you are following.  It can be increased by increasing the number of repetitions, increasing the load of the weight or reducing the rest periods allowed between sets and between exercises.
 
Muscle Isolation: is the method of exercising a body part independently of other body parts.  In order to ensure maximum growth and development, shaping and strengthening a given body part, it is necessary to provide that body part with uninterrupted work.
 
Split Routine: is the technique of working only certain body parts on a given day.  A routine can be spilt into two or three workout days.  It allows muscles the required 72 hours rest before they are challenged again. Example: upper body routine on Monday, aerobic activity on Tuesday and lower body routine on Wednesday.


The Modified Pyramid System: involves the addition of weight and the reduction of repetitions for each set until the peak of the pyramid is reached.  Then the set ends.  The continual progression of weight allows the muscle to be challenged to work up to capacity, ensuring optimal development.

  • Set 1: 12 reps at 3 pounds
  • Set 2: 10 reps at 5 pounds
  • Set 3: 8 reps at 8 or 10 pounds
 
The Pyramid System: involves the addition of weight and the reduction of repetitions with each set until a peak is achieved, then the reduction of weight and the addition of repetitions until the final set is identical to the initial one.

  • Set 1: 12 reps at 3 pounds
  • Set 2: 10 reps at 5 pounds
  • Set 3: 8 reps at 8 pounds
  • Set 4: 10 reps at 5 pounds
  • Set 5: 12 reps at 3 pounds


To keep your workouts simple and doable, use free weights/dumbbells.   If you’re already familiar with other equipment like resistance bands or circuit training equipment, then by all means use them.  You can start with lighter weights if necessary or even use soup cans if you don’t have dumbbells. Just don’t let not having weights keep you from working out.   You can get a good workout just using your own body weight and flexing your muscles during the contraction.


Recommended Weights for performing the basic strength training program:

  • Set 1: 3 pounds
  • Set 2: 5 pounds
  • Set 3: 8 or 10 pounds

For this basic strength training program we will be using The Modified Pyramid Technique.


How to perform each routine using The Modified Pyramid Technique:

Set 1.   Do 12 reps for all three exercises within the specified body part routine using 3 pound           weights without resting.  Once you’ve completed all three exercises for the specified body part, this is your first set.  Then rest 10 to 15 seconds before going to next set.

Set 2.  Do 10 reps for all three exercises within the specified body part routine using 5 pound weights.  This is your second set.  Then rest 10 to 15 seconds before going to next set.

Set 3.   Do 8 reps for all three exercises within the specified body part routine using 8 or 10 pound weights.  This is your third set.  Then rest 10 to 15 seconds before going to your next body part routine, then repeat sets one, two and three.


Here is a crash course in basic strength training or resistance training:

Regular Upper Body Strength Training Workout includes Biceps, Chest, Shoulders, Upper back, Triceps. Perform the exercises in the given order.


Bicep Routine:

1.   Standing alternate dumbbell curl - stand with feet shoulder width apart, weight in each hand, arms at sides, palms facing forward.  Bend and lift one arm up to shoulder as you bring it down lift other arm to shoulder. This is one rep

2.   Standing angled simultaneous dumbbell curl - stand with feet shoulder width apart, weight in each hand, arms at sides, left palm facing left and right palm facing right.  Bend and lift both arms simultaneously towards shoulders then lower.  This is one rep.

3.   Standing alternate hammer curl - stand with feet shoulder width apart, weight in each hand, arms at sides, palms facing your body.  Bend and lift one arm up to shoulder as you bring it down lift other arm to shoulder.  This is one rep.


Chest Routine:

1.   Incline dumbbell press(use flat surface if no incline available) - lie on bench with weight in each hand at chest level, palms facing upward, simultaneous extend arms up until elbows almost lock, then lower back to chest.  This is one rep.

2.   Incline dumbbell flye with a twist(use flat surface if no incline available) - lie on bench with weight in each hand, arms extended upward over your head, palms facing out and ends of dumbbells touching, slowly bend at the elbow and lower arms in a semi-circle like hugging a beach ball until reach full stretch, return to start position and flex chest muscle as ends of weights touch.  This is one rep.

3.   Cross-bench pullover - lie flat on bench or flat surface on your back with your head hanging over the edge, grasp one dumbbell with both hands extended above your head, lower arms slowly until can’t go further, then extend back to start position.  This is one rep.


Shoulder Routine:

1.   Standing side lateral - stand with feet together, dumbbell in each hand, arms down and in front with palms facing each other and weights touching.  Raise arms outward and up to shoulder height then lower.  This is one rep.

2.   Standing front lateral - stand with feet together, dumbbell in each hand, arms down and in front with palms facing each other.  Raise arms straight up to shoulder height without bending arms then lower again.  This is one rep.

3.   Pee-wee lateral - stand with feet together, dumbbell in each hand, arms behind your back weights touching knees slightly bent.  Simultaneously raise both arms to ear height then lower to start position.  This is one rep.


Triceps Routine:

1.   One-arm overhead triceps extension - stand with feet together, with dumbbell in left hand raised overhead touching left ear, palm facing your body.  Lower dumbbell behind your head as far as you can, then return to start position.  This is one rep.  Finish your set with left arm then switch to right arm.

2.  One-arm triceps kickback - stand with feet together, weight in left hand at chest level and palm facing body, bend forward slightly at waist and knees.  Extend left arm back and flex tricep, return to start.  This is one rep.  Finish your set with left arm then switch to right arm.

3.   Flat cross-face triceps extension - lie on flat surface, arm fully extended with weight in left arm, palm facing in, slowly bend at elbow so weight touches your right neck/shoulder, return to start.  This is one rep.  Finish your set with left arm then switch to right arm.


Back Routine:

1.   Reverse bent dumbbell row - stand with feet shoulder width apart, dumbbell in each hand about 6 inches away from the body, palms facing away from body, bend at knee and bend forward, raise both weights with bent arms until reach waist height, flex or squeeze your back muscles then return to start position.  This is one rep.

2.   Bent dumbbell shrug(dead lift) - stand with feet shoulder width apart, dumbbell in each hand, arms down, palms facing body, with slightly bent knees and torso bent, weights about knee high, lift straight up and shrug your shoulders back and down, return to start position.  This is one rep.

3.   Dumbbell upright row - stand with feet a natural width apart, hold one dumbbell with both hands, palms facing your body, arms extended downward, keep weight close to body then raise it up to chest height with elbows bent out, lower back down.  This is one rep.


Regular Lower Body Strength Training Workout includes Thighs, Buttocks, Abdominals, Calves. Perform the exercises in the given order.


Thigh Routine:

1.   Regular Squat - stand with feet natural width apart, weights in both hands with arms at your sides, palms facing your body.  With your back straight, bend/squat as low as you can comfortably with proper form until you feel a stretch in your quads and glutes then return to standing position.  This is one rep.

2.   Lunge - stand with feet natural width apart, weights in both hands with arms at your sides, palms facing your body.  Step forward with left leg about 2½ feet then bend your right leg until knee almost touches the floor or as far as possibly comfortable and you feel slight stretch in front thigh.  Then stand and retract left leg back to start, this is one rep.  Continue all three sets for left leg then repeat with right leg forward.

3.   Sissy Squat - stand with feet natural width apart (no weights required), place one arm on a stable object like a stool, wall, or doorknob then raise up on your toes.  Now lean back as far as possible with slight bend in knees without falling, feel the stretch and squeeze the buttocks.  Return to start position.  This is one rep.


Buttocks/Glutes Routine:

1.   One-legged butt lift - using a chair or other sturdy object, you can either kneel on the floor or perform standing up.  Hold the chair with your right arm for balance, then extend left leg back and up as high as possible while grasping and squeezing your left buttocks.  Return to start position.  This is one rep, then finish all three sets for left leg then repeat for right leg.  2.   Lying butt lift(bridge-up) - lie flat on your back with knees bent, legs a natural width apart.  Place hands just under your buttocks squeezing them tight, then raise your buttocks off floor as high as possible without your shoulders leaving the floor, then lower to start.  This is one rep.

3.   Feather kick-up - get on floor placing both hands and knees shoulder width apart (as if about to crawl) so you are propped up and your back is straight and parallel to the floor.  Keeping your left leg bent, raise it to the ceiling and squeeze buttocks at the top, then lower back to start.  This is one rep. Continue all three sets for left leg then repeat for right leg.  You can add resistance to this exercise by placing and squeezing a weight between the bend in your leg.


Abdominals Routine:

1.   Ab Crunch - lie on your back with knees bent and feet on the floor, both hands behind your neck and imagine you have an orange under your chin, then without arching your back lift your chest and shoulders off the floor and hold for 5 seconds.  Keep your elbows out and back straight and return to start without relaxing when you touch the floor, but immediately go to next rep.  To add resistance you can hold weights in both hands and cross them across your chest.  If you have back problems you can prop your feet on the seat of a chair.

2.   Leg raise - lie flat on back with arms behind neck and legs straight on floor.  Simultaneously raise legs without bending knees then lower to start position.  This is one rep.  Alternative, raise left leg(count #1) then raise right leg(count #2), lower left leg(count #3) then lower right leg(count #4). Repeat until complete all three sets.

3.   Reverse Crunch/leg-in - lie on back with arms at sides, bend knees, keep feet on floor and don’t arch your back.  Squeeze legs together and raise until body is at 90 degrees and slightly lift butt off floor about 2 inches then lower back to floor.  This is one rep.  You can add resistance by doing a leg-in which you place a weight between your feet as you crunch your legs in.

As an alternative abdominal exercise in place of the crunch or reverse crunch, and opt for one that focuses on your obliques, you can substitute the foot-2-foot crunch.
 
Foot-2-Foot Crunch- lie on your back with knees bent and feet on the floor, arms at your sides and shoulders off the ground.  Bend to the left and try to touch your heels, then bend to the right trying to touch your heels all while maintaining the crunch position.  This is one rep.


Calves Routine: (simple but very effective)

1.   Standing angled-out-toe calf raise - stand with feet a natural width apart, weights in both hands, palms facing your body.  Point your toes outward away from your body then stand up on your toes as high as possible flexing your calves at the top then lower back down.  This is one rep.  Complete all three sets with your different weights.

2.   Standing straight-toe calf raise - same as exercise #1 except your toes are facing forward. Complete all three sets

3.   Standing angled-in-toe calf raise - same as exercise #1 except your toes are pointed inward (pigeon toed).  Complete all three sets.

As this routine becomes easier you may add one more exercise to each routine(Progression).  For the biceps, triceps, back and calves, you should do no more than four exercises in the routine.  But, for the chest, shoulders, thighs, buttocks, and abdominals you can do up to five in the routine.  This keeps your working out of that body part safe and effective so as not to overwork the muscle and do more harm than good.

Please refer to The Fat Burning Workout book for more advanced level workouts and exercise descriptions.  You are encouraged to choose any three exercises you may find during your research for each body part and use instead of the above mentioned exercises.  These are placed here to give you a working blueprint for effective strength training at home or at a gym.   Some of the exercises are directly from The Fat Burning Workout, but some were modified based on some industry standards.  Many of these exercises are fitness industry standards but they go by different names.  If you don’t have three different weight sizes you can modify the sets using just one 10 pound weight for all three exercise and doing 10 reps per exercise.

Working out should become an essential part of your daily routine.  You have to make time for your workouts and make them a priority.  Because if you don’t then you will allow any minor distraction to become an excuse not to exercise.  If the people in your life do not understand why you are so determined to workout everyday and eat healthier everyday, or why it is important for you, then they too will become a distraction and an excuse to skip your workouts.  It is time to devote just one hour a day on improving your health because each day you complete a workout and add a new healthy habit, it gets you one step closer to a better body.  You make time for everything else in your life, yet you constantly make excuses as to why you can’t exercise.  You can, its just not a priority.  This happens to be The New Year 2013, therefore your resolution should be simply to make working out and eating healthy a priority just by devoting one hour a day.  The key to success is for you not to beat yourself up if you skip a day, but instead to pick up where you left off.  Don’t let one or two minor setbacks become an excuse to ditch your entire program.  You have to believe that you are worth and any sacrifices you think you are making by choosing exercising over other activities and know that this choice for better health will be well worth it.


Disclaimer: This article is meant only to provide information. It should not be substituted for expert medical advice. When starting any weight training exercise, no matter what size weight whether light or heavy you should check with your doctor first.
 
.

 
Weekly Checklist
Drink 8 glasses of water every day
Eat a Hearty Healthy breakfast
Get movin’ by walking or aerobics
Eat an Apple or Pear everyday
Say no to your poison, ditch the junk food
Go a little nuts by eating a handful of nuts
Toss Up a Big Bowl of Salad
Take Your Vitamins
Pump It Up!!!


Assignment One

This week’s assignment is two-fold. First, in week one, assignment two you were to start a food journal so you can track what you eat daily. If you haven’t been keeping a food journal, then you will start one this week and continue until the end of the project cycle. The premise behind keeping a food journal is so you become more consciously aware of what you are eating. Therefore, you will be more aware of what you put in your mouth. Second, it also helps to cut down on unaccounted for calories that slip by you especially when snacking. Even though most of the week new habits do not focus on calorie counting, you should become aware of portion sizes and their calorie content. So, add to your food journal, the calorie count when available. Therefore, when the time comes for you to start cutting calories in order to lose more weight quickly, you will have a better chance.


Assignment Two
For this assignment, you will create a monthly workout calendar for your scheduled workouts. Leave room so you can jot down your actual workout for that day in case you skipped one or performed a different one than the one you scheduled. It can be as simple as marking on Monday: upper body, Tuesday: 45 minute walk, Wednesday: lower body etc. On a separate piece of paper or in a notebook you should list the actual exercises, weights and reps for each routine, so your workout flows smoothly. You want your workouts to be stress free so be prepared to know what to do. Always workout in proper shoes and lose clothing.


References

“The Lean - A Revolutionary and Simple 30 Day Plan for Healthy, Lasting Weight Loss” by Kathy Freston
“The Fat-Burning Workout: From Fat to Firm in 24 Days” by Joyce L. Vedral, Ph. D, pg 36-38
http://www.joycevedral.com
The American Council on Exercise
www.acefitness.org/exerciselibrary/default.aspx
Pasion4Profession
http://www.passion4profession.net/